

My inspiration for making my grandson this neat Thomas the Train Quilted Travel Play Mat came from some tutorials I have seen that used fabric featuring cars, trucks and streets. Since my grandson loves Thomas the Train and this Thomas the Train fabric is the only one my local fabric store carries that would work, I decided to switch from cars to trains. And since I am a quilter at heart, I put a quilty twist on it. It has pockets for the trains and folds up to fit into his Mom's purse.
Here's how I made it.
I bought 1/2 yard of the Thomas the Train fabric. I trimmed off the selvage and evened up the edges. I then cut the fabric into two pieces on the fold so that there were two rectangles 18 inches by 22 inches. I had plenty of scraps and other fabric in my stash to make the pockets and binding, as well as lots of leftover quilt batting scraps. This is just like making a mini quilt. The play mat I made has the same fabric on both sides and the child can use either side for pretending to drive his trains.

I taped down the edges of one piece of the fabric, face down, before layering the mini quilt sandwich.

On top of the taped down rectangle, I layered the quilt batting and the other rectangle face up and then pin basted it.


Then I free motion quilted the quilt sandwich in a meander design.

This is what it looked like after being quilted:

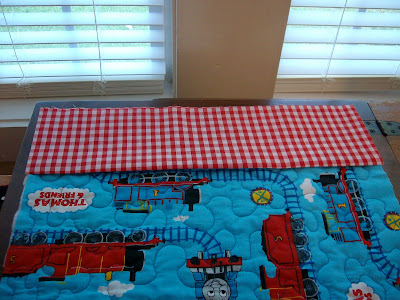
For making the pockets for the trains, I used two pieces of coordinating fabric 18 inches wide and 10 inches long. I folded both pieces in half lengthwise which made the pockets a double thickness and about 5 inches deep. I pressed it well and pinned the raw edges on one end of the quilt. When the binding was sewn on the quilt the edges of this fabric were sewn down right along with the binding.

I then sewed on the binding. For instructions on this, see my quilt binding tutorial HERE.

After the binding was finished, it was time to sew the seams to create the pockets. I laid the toy trains on top of the fabric to see what size I needed. The little trains I bought to go with the mat are about the size of a matchbox car, maybe just a little bigger, and the pockets needed to be about 3 inches wide.

The finished play mat front:

Back:


After placing the trains in the pockets, I folded the play mat up from the bottom in 4 inch or so sections and added two small velcro squares to help secure the play mat. Then I folded that in half. I think if I make another one I will omit the velcro, since the play mat folded up and stored in my daughter's purse just fine without it.

This would work for lots of different ideas for kids. I'm thinking of a princess theme for a little girl with pockets for her small dolls. Also an army theme for a boy with pockets for the toy soldiers and tanks. How about a farm theme one with pockets for the tractors?
Another good thing about this project is that the child can take the small quilt to bed with them and use it as a cuddle quilt, without the toys.

9 comments:
Looks like your grandson enjoys it! What a great thing! Can't wait to read more from you.
www.aqsquiltnews.blogspot.com
That is a good project--he is so engrosed. Good job, Grandma.
Love, love, LOVE this project! I'll be keeping my eyes open for "play" fabric now!
I love the idea of being able to adapt the same idea for a girl. Your grandson is certainly enjoying it.
This is a lifesaver- I don't even know how I happened onto your blog, but my son LOVES thomas and this is genius! Thanks. definitely doing this!
What a genius idea! My boys have loads of Thomas trains and always insist on taking things when we go out, I'll definately add this to my to do list. Thanks for the tutorial :o)
OMG...that is such a lovely playmat. I was in search of playmat inspiration and i reached your blog..thomas the train is my nephews favorite too...i'm looking forward to make a playmat for him..thank you for the idea
wow! so cool!
WOW! Looks awesome!
Post a Comment